Before you trowel on the mortar, sweep the floor clean. Calculate how many tiles you need in each layout grid and stack them around the room closest to each section. That way you won’t have to go back and forth for new tiles when you start laying each grid.
Sort through all the tile boxes to make sure the dye lots match and separate out any chipped tiles. Use these for cut pieces.
If you are installing saltillo or handmade tile, its color may be consistent within each carton but vary from box to box. Sort through the tiles; at each layout grid mix some from each box. Doing so spreads the colors evenly in the room and keeps them from occurring in patches.
Prestart Checklist
Time - About an hour to trowel and set 4 to 6 square feet (varies with tile size)
Tools - Mortar mixing paddle, 1/2-inch electric drill, notched trowel, 4-foot level, beater block, hammer or rubber mallet, utility knife, sponge
Skills - Mixing with power drill, troweling
Prep - Install backerboard, clean surface, snap layout lines
Materials - Five-gallon bucket, thinset, tile, spacers, 3/4-inch plywood squares
Determine the layout
One of the most common problems in planning a tiled floor is out-of-square walls. Walls seldom define a room squarely, but you need some perpendicular reference to square your tile layout with the room.
To determine if a floor is square, use a 3-4-5 triangle: Snap a chalkline on the floor at the midpoints of opposite walls. From the intersection measure out one line a distance of 3 feet. Tape the chalkline at that point and measure and tape a distance of 4 feet on the other line. Now measure the distance between the tapes. If it’s 5 feet exactly, the floor is square. Adjust the lines, if necessary, until they are perpendicular.
Make a sketch of the layout of the tile on your floor. Even a rough drawing will help you organize. Wavy walls can mean you will need to cut some of the edge tiles at different widths. Check the walls with a 4-foot level and mark wavy sections on the drawing as accurately as possible.
Mark the Layout Lines on the Floor:
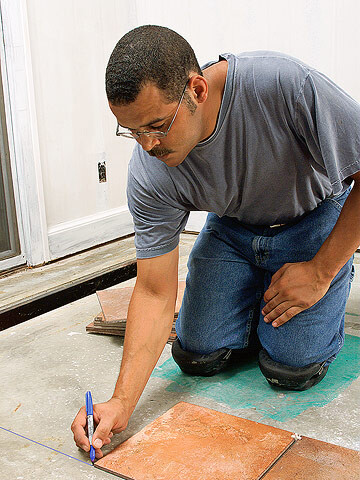
Step 1
Dry-lay your tile with spacers on each axis. When the layout is square and even, mark the floor at several junctures of the grout lines. Take up the tile and snap a chalkline at the centermost pair of marks.
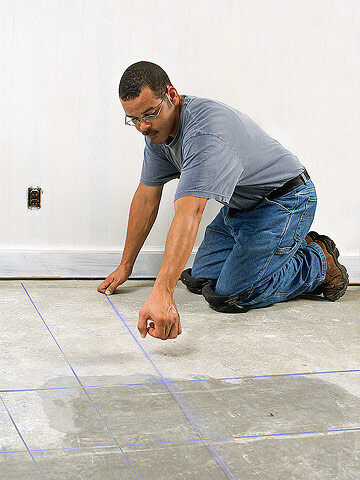
Step 2
Continue to snap chalklines across the surface of the floor at points that represent the edges of the tile. These layout lines will serve as guides to help you keep each course straight and square with the room.
Different room configurations
The room’s configuration also dictates your approach to layout lines and grids. For small square or rectangular rooms, the number of lines will be minimal, and it is unlikely that you’ll need a line at the edges to mark the location of cut tiles. In a large room with large handmade pavers, add lines marking the location of the edge tiles and snap 3-foot grids to help keep it straight. In an L-shape room, position the lines along the longest walls so they fall in both sections. In all cases snap the first pair of reference lines where a grout line will fall.
Setting the Tile
Step 1
Pour the water into a bucket, then add about half the dry thinset. Mix the thinset with a 1/2-inch drill and a mortar paddle. Keep the speed below 300 rpm to avoid introducing air. Add thinset a little at a time. When the thinset is evenly mixed, let it set for 10 minutes before applying.
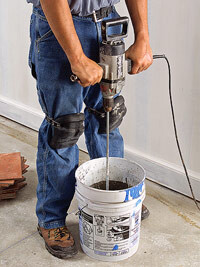
Mix the Thinset
Whether you have chosen thinset or organic mastic to set your tiles, bring it into the room to acclimate it to normal room temperatures – ideally between 65 degrees and 75 degrees F. Mix thinset with water that is clean enough to drink and clean out the bucket after each mix; mortar and adhesive residue can cause a new batch to cure prematurely.Adding the powder to the water a little at a time reduces airborne mortar dust and makes mixing easier. Let the mixture set for 10 minutes so the water will penetrate any remaining lumps. Then mix again to remove lumps. To test the consistency load a trowel with mortar and hold it upside down. If the mortar falls off the trowel easily, add more dry powder and remix. The ideal consistency is as thick as peanut butter. Clean the subfloor before applying thinset adhesive.
Step 2
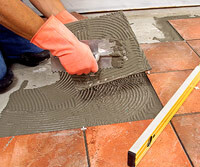
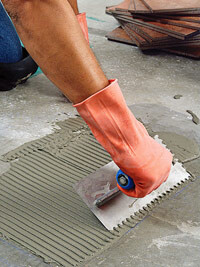
Dump mortar at the edge of a section of the room. Holding the straight edge of a trowel at about a 30-degree angle, spread the mortar evenly as thick as the depth of a trowel notch. Spread the mortar to the layout line; comb it with the notched edge at about a 45- to 75-degree angle.
Testing the mixture
Properly applied thinset forms ridges that compress to cover the entire back of the tile when it is embedded. If thinset is applied too wet, it will not hold these ridges. A dry thinset application will not compress and will result in the tile adhering only to the top of the ridges. Test a thinset mixture occasionally by pulling up a tile and examining the back. If the thinset completely covers the surface, the mixture is correct.
Step 3
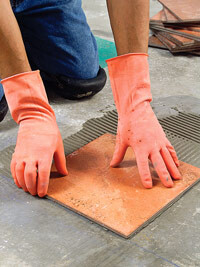
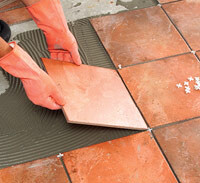
Starting in the center of the room, set the first full tile at the intersection of your layout lines, positioning it with a slight twist as you embed it in the mortar. Do not slide the tile – sliding can thin out the thinset and push mortar into the joints. Keep the edges of the tile on the layout lines.
Step 4
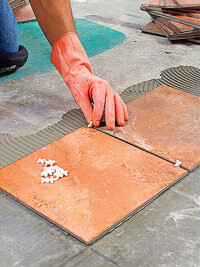
Using the layout pattern you have chosen, lay the next tile in place with the same twisting motion, keeping the tile aligned on your layout line. Insert spacers between the tiles and adjust the tiles to fit.
Step 5
Following the method outlined in step 4, continue setting tiles in a straight line. Trowel on only as much thinset as you’ll cover with each row of tile.
Step 6
Periodically check to make sure the tile conforms to the layout lines in both directions. Lay a long metal straightedge or 4-foot level on the edge of the tile. This edge should align itself with the layout lines. Each joint within the pattern should also be straight. Scrape off any excess thinset that may have spread over a layout line. Adjust the tiles to straighten the joints if necessary.

Step 7
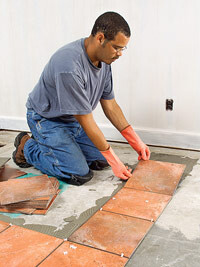
Continue laying the tiles according to your chosen pattern, spacing and checking them as you go. Don’t kneel or walk on set tiles. If you need to straighten a tile that is out of reach, lay down a 2-foot square of 3/4-inch plywood to distribute your weight evenly and avoid disturbing the tile. Cut at least two pieces of plywood to use, so you can position one while kneeling on the other.
Choose the right trowel
The size of the notches in the trowel you use will depend on the thickness of the tile. The depth of the notch, and therefore the ridge it forms in the adhesive, should be about two-thirds the tile thickness. For 6- to 8-inch floor tiles, use a 1/4- to 3/8-inch square-notched trowel; for large tiles (more than 12 inches), use a deep (1/2-inch) square-notched trowel. Combing adhesive so it forms the right-size ridges requires that you hold the trowel at about a 30-degree angle and keep the edges in constant contact with the substrate. If you have trouble making 1/4-inch ridges with a 1/4-inch trowel, switch to a 3/8-inch notch and hold the trowel at a slightly lower angle.Setting spacers
When laying loose tiles (not sheet-mounted), use plastic spacers to keep the tiles the proper width apart.Insert spacers vertically in the joint after you set each successive tile. That way the tile will move into the correct placement after it is embedded in the mortar. Once you reach a point where tiles form corners, flip the spacer down into the corner. Pull the spacers before grouting, even if the manufacturer’s instructions indicate that you can leave them in place. Spacers may show through the grout.
Leveling the Tile
Step 1
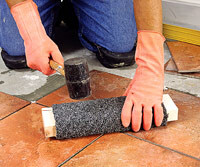
To level any section or grid of tile, place a long metal straightedge or a 4-foot carpenter’s level on the surface and check for any tiles that are higher or lower than the overall surface. Make a beater block out of a 12- to 15-inch 2x4 covered with scrap carpet. Tap high tiles in place using the beater block and a hammer or rubber mallet.
Step 2
If you discover tiles that are lower than the rest, pry them up with the point of a utility knife and spread additional adhesive on the back of the tile. Set the tile back in place and level it with the beater block. Clean excess mortar from the joints while the mortar is still wet. Run the blade of a utility knife in the joint, flicking out the excess as it accumulates on the blade. Pick up loose bits of mortar with a damp sponge. Let the thinset cure at least overnight.