One advantage of sheet vinyl flooring is that it has fewer seams than other materials, making it an excellent choice for kitchens, baths, laundry rooms, and other utility areas. Because it comes in rolls that are 12 feet wide, you can install it in smaller rooms with no seams at all. There are two types of sheet vinyl. Full-spread vinyl has a felt backing and requires an adhesive that spreads over the entire floor surface. That makes installation a little time-consuming; however it rarely comes loose from the floor. It requires an almost flawlessly smooth underlayment – even small particles under the sheet will show up as bumps when the sheet is glued down. Perimeter-bond sheet vinyl is laid with adhesive only around the edges of the room, making it easier and quicker to lay. It is more forgiving of minor underlayment flaws but is more prone to coming loose.
Checklist
Time - About 4 hours for full-spread vinyl on a 10x12-foot floor
Tools - Utility knife, compass, marker, scissors, floor roller, seam roller, straightedge
Skills - Measuring and cutting accurately, lifting, seaming vinyl
Prep - Install or repair underlayment without surface defects; remove all floor trim.
Materials - Butcher paper or kraft paper, masking tape, duct tape, vinyl sheet goods, adhesive, seaming solvent
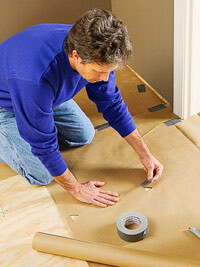
Step 1
Make a template by covering the perimeter 1/4 inch from the walls with butcher or kraft paper. Heavier paper moves less. Cut small triangles and tape the sheet to the floor through the holes. Overlap all edges at least 2 inches and fasten with duct tape. Roll up the template and take it to the room where you’ll cut the vinyl.
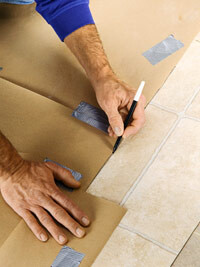
Step 2
Unroll the vinyl sheet faceup. Overlap seam edges by 3 inches and tape the seam. Unroll the paper template on the vinyl sheet, lining up the edges of the template with pattern lines. Tape the template to the sheet and mark its edge on the sheet with a washable marker.
Step 3
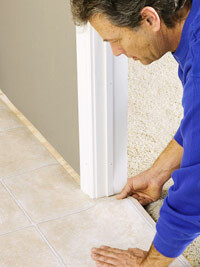
With a straightedge along the marks on the sheet, cut it with a utility knife. Roll up the sheet with the pattern side in and carry it to the floor to be covered. Unroll the sheet, sliding it under door casings, and tug and shift it into place.
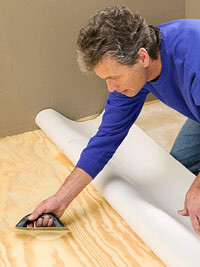
Step 4
For a full-spread floor, lift up one half of the sheet and fold it back. For perimeter bond, lift up the edges. Spread adhesive from the corners to the center with a 1/4-inch notched trowel. Refold the sheet back into place. Adhere the second sheet (or the other half if not seaming the sheet vinyl).
Seaming the Sheet Vinyl Step 5
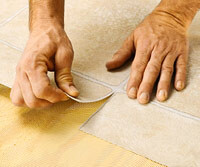
To cut a straight seam, overlap the edges 3 inches and snap a chalk line where you want the seam. Using a straightedge and utility knife, cut through both sheets in one pass. Pull back the edges and apply adhesive under them. Push seam edges down into the adhesive.
Seaming the Sheet Vinyl Step 6
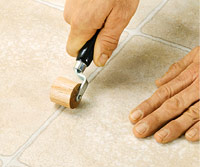
Roll the seam with a seam roller (called a J-roller). Use moderate pressure to avoid pushing adhesive up through the seam. Wipe off excess adhesive and let it cure. Then apply seaming solvent to fuse the edges.
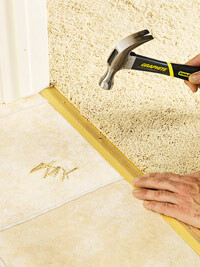
Step 7
Roll the entire surface from the center to the edges with a rented 100-pound floor roller. Use a damp rag to wipe up any adhesive around the edges of the vinyl. Replace the trim, then install baseboards and shoe molding or vinyl cove base. Install thresholds and rehang the doors.