Two-Handle Cartridge (Disk) and Diaphragm Faucets
Many newer two-handle faucets use individual cartridges or diaphragm stems. Both types are long-lasting and easy to repair.
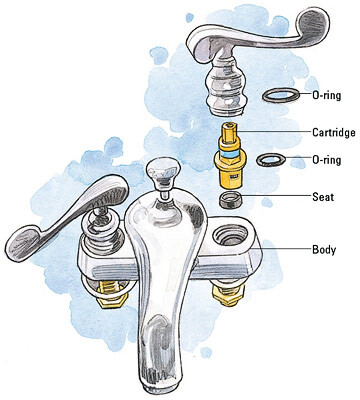
An individual cartridge is similar to a single-handle cartridge. It contains a plastic or rubber valve that opens and closes to permit or stop the flow of water.
Fixing a leaky faucet may require replacing the cartridge or replacing O-rings and seals, depending on the manufacturer and model.
Prestart Checklist
Time - Less than an hour for most repairs
Tools - Screwdrivers, groove-joint pliers, perhaps a socket wrench, and a handle puller
Skills - Shutting off water, dismantling a faucet, installing small parts
Prep
Shut off the water, close the sink stopper, and place a rag in the sink to catch any parts
Materials - Replacement cartridge or O-rings and seals, silicone grease
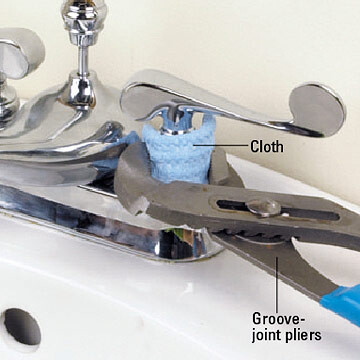
Step 1
Shut off the water. Turn the handles on to drain out any water. The handle may be held with a top screw, or it may twist off. Wrap the handle with a cloth before twisting it with groove-joint pliers
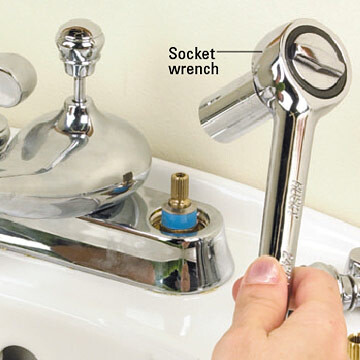
Step 2
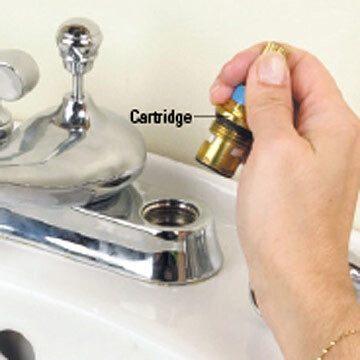
Pull the cartridge up and out. With some types it is important to note which direction the cartridge is facing so you can reinstall it facing the same direction. You may need to use a socket wrench, pliers, or even a special pulling tool made for certain brands of stems.
Step 3
If the cartridge is metal, replacing the rubber parts usually fixes the problem. Pry off the rubber seat at the bottom.
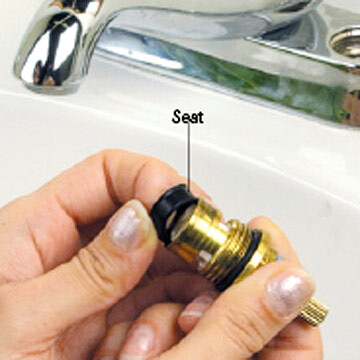
Step 4
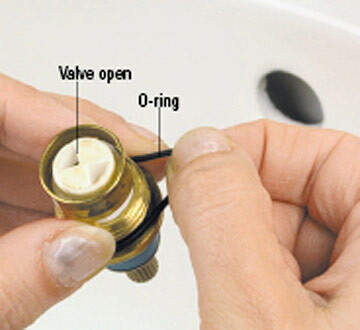
Twist the cartridge spindle so the valve opens. Wash out any debris. If the internal parts are worn, replace the cartridge. Replace the rubber seat and any O-rings. Rub the parts with silicone grease.
Step 5
Install the cartridge and the handle and test. If you cannot turn the water on or off, remove and reorient the cartridge.